Yesterday we had the opportunity to showcase our shop with Daisy Jade of Pittsburgh Today Live on CBS. It was a ton of fun! If you didn’t catch it, check it out here:
What a fun time! Check it out!
Your Ring Is special, We think so too.
Yesterday we had the opportunity to showcase our shop with Daisy Jade of Pittsburgh Today Live on CBS. It was a ton of fun! If you didn’t catch it, check it out here:
What a fun time! Check it out!

“Work Bench Con” is a maker event centered around the wood working community and directed towards content creators in all levels of growth. I had the pleasure of attending it in 2019 and this conference did more to inspire me, grow my company, and grow my personal relationships within the maker community than anything i’d done to date. After attending again in 2020, and 2022- I have some thoughts.
I am, rather notably, not a wood worker- so why was I at a wood working conference?
The simple answer is: “The wood working community is 10 years ahead of the blacksmithing world”. I have found that the people that play with wood have established a sense of importance of social media influence, in person demonstrations/events, paid partnerships with brands, and sponsored content that is so far ahead of the blacksmithing world- it’s insane. While blacksmiths tend to gravitate towards some relatively active Facebook groups and cluster around an obsession with a small niche (knife making)- the wood people engage each other simply for liking that stuff that grows in the middle of trees. They all support each other, whether they like to make round objects on a machine that makes round objects (these people are called “wood turners”) or people that prefer square objects on a variety of machines that make things square (these machines are called “planers”, “Jointers”, and “Saws”).
The brands that appear in the wood world are actively trying to grow in the metal community- but since the blacksmithing world consists mostly of old men that only gather once or twice a year in small groups to remind each other and specifically younger people that “they're doing it wrong”, these brands have no good way to find YOU. These companies are at Work Bench Con representing their brands and products, they’re there specifically to meet influencers, give away product, and build relationships that grow towards sponsorships. Since everyone there does that wood stuff, I assure you….. rolling up to them and telling them “oh actually, I do metal!” always gets a unique and eager conversation. In some cases, these brands have a separate budget/plan for wood people and metal people, so in a sea of content creators competing for their affection in the wood game…. you’ve got the secret entrance to that “other” budget/plan, and without the competition!
If you’re one of those “wood people”- you should absolutely go! There’s so many of your favorite you tubers, incredible classroom experiences that will teach you about how much you suck at Pintrest and how important instagram Reelz are. These classes are taught by colleagues that have found their success in each of these platforms, and while you’ll definitely take some hand written notes and leave the event with a renewed passion and list of goals to implement for your growth- you’re likely going to do nothing. After a year of doing nothing with these notes and remembering again next year that you didn’t start posting to Tik Tok, you’ll at least be aware of how much ya sucked at implementing your growth strategy and you’ll have a phone completely filled with video clips and dances you never posted anywhere.
The best part about work bench con is meeting the few people that DID implement their growth strategies and learning from them, while being friends and easily relating to all those that also forgot to use Pinterest.
You’re going to make new friends, establishing a support network and you’ll spend the year messaging each other on the Instagrams and Myspaces and hopefully you’ll remind each other to post those weird trends.

I first attended Work Bench Con in 2019 without knowing anyone there, or really anything of “the maker community”. WBC was the single event that launched my business into a full time career, that taught me how to grow my presence and properly value my product and reach. WBC is where I met most of my current group of friends, and I wouldn’t miss it for the world! Don’t worry when you don’t know everyone’s names at your first event, you’ll grow and make so many new friends! Keep at it! If you’re any kind of “maker”, this is the event for you!
Yes, it can be expensive. I budget about $2,000 for the entire trip including airfare, the hotel (which is expensive!), food, and many many drinks. I’ve found buying a brand rep a beer and having a casual conversation with them as a person, rather then as a brand, will get you further then anything else! The cool kids show up a full day early, rock out to the aquarium, and hang hard and late in the hotel lobby on “night zero”. Don’t forget- it’s a marathon, not a sprint! Pack plenty of pedialyte and Liquid IV, schedule your week following WBC to allow for your crippled voice, and pack a checked bag with room for swag! People love to trade in stickers, bring plenty of business cards, and no matter how much cheaper it may be to stay “off site”- suck it up and stay at the hotel, that’s where the party’s at. I’ll be flying in Wednesday March 1st and planning my annual “Hung over trip to the aquarium” for Thursday morning- wana come?
You must be at least “THIS” hung over to partake! (Last year some big you tubers were vomiting in a trash can or trying their finest to hold down a load of cafeteria chicken fingers- it was a success!).
Look, if you get a chance to climb under the taneu cover of someones truck with a bunch of new friends to drive to a Waffle House at midnight- ALWAYS DO IT. If your quest for chaco tacos takes you into a weird area of town- that’s fine! If a stranger you met at the internet offers to pick you up at the airport and drive you to an old man’s house that doesn’t want to sell anything…. DO IT, I got a 500lb fisher anvil from work bench con last year! When the security guard shuts the party down, throw your empties at them. If you’re coming solo- get the room with two beds, because even though your friends that saved money and got that Air B n B didn’t want to contribute and split the room costs with you, they’re going to sleep there. Heck, we had NINE PEOPLE staying in my room, and I didn’t even know all of them! (that got weird).
It’s a good time, you won’t regret going- but you will regret some of the decisions you make there, let’s make them together! Cheers, Friend!
For more information on Work Bench Con and to get your tickets- head over to their website, i’ll include the link to make things easy.
See ya there!
Last summer we got to spend some time with Host Ashley Adams for an awesome episode of the TV Series “Maker Nation” on “Very Local”. You can download their app to watch the full episode or check out the preview here:
In this episode we talk all about The Barefoot Forge, how I got started in blacksmithing, and help the host Ashley Adams to craft something with her own hands that she can be proud of. The day gets a little weird when I surprise the crew and host with some skill development- opening bottles of champagne and beer with a variety of utility tools through the act of sabrage.
Maker Nation appears on Very Local
There are many ways to get metal to darken and become water resistant- but here’s how we usually do it. We’ve tried some of the modern blackening products and methods, ranging from spray paint to powered coating- and while these are great for things that will be outside and exposed to long term weather- they lack the traditional feel and look that we like.
In our shop, we have to blacken and produce about 500 bottle openers a year for retail sale, and they need to be consistent. We also darken about 2,000 bottle openers a year in classes, using a slightly different process due to time restrictions, so we’ll start by showcasing our most refined method for production pieces.
A brief tutorial on our "Quick and Dirty" Method of Quenching and Darkening Forged Steel. We use this process to make a uniform, water resistant finish on al...
We mix a combination of beeswax, boiled linseed oil, and turpentine in a metal paint can, and apply it to warm pieces. Our ratio is measured out roughly, and it doesn’t require too much precision, since certain components burn off faster than others.
We mix a ratio of 4:2:1 Beeswax: Turpentine: Linseed Oil
Start with 4 “Red Solo Cups” full of Yellow Beeswax, put it in a disposable aluminum baking tray, and warm it in your finishing oven till liquid. We raise our own honeybees, but often need supplemental beeswax- so we purchase our beeswax off amazon here:
(2lbs is a good start and will fill a paint can about half full. 2lbs equates to 4 red cups)
We heat it at 300F, beeswax starts to liquify at about 150F and has a flash point of 400F. Do not exceed 400*F!
Keep in mind we’re measuring this out cold and accounting for SOME pore space that exists between these little pellets. We pack it into the cup tightly to reduce that space as much as possible, reducing this pore space. Melt this in a dedicated “Finishing” oven, a $50-100 Countertop Toaster Oven will do, so long as it’s capable of reaching 350*F. You’re going to ruin this oven over time due to waxy smoke, spills, etc- so we highly suggest a dedicated oven! I often buy these at garage sales or thrift stores, and routinely get a replacement once my current one is full of wax and disgusting.
Once this is melted, pour it into a NEW 1 gallon paint can. We use a can with a liner and over the years have not melted the liner. New cans are available through homedepot or amazon and cost about $10- but be sure to get a lid with it!
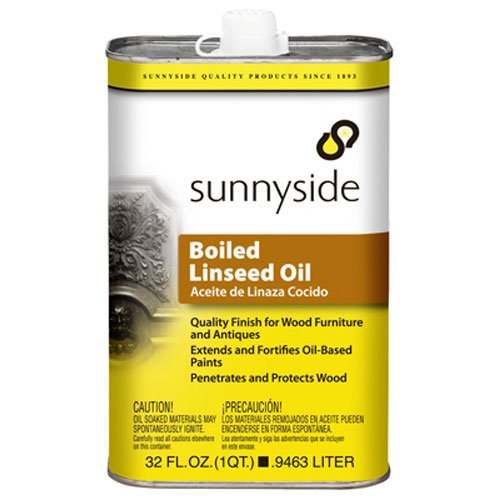
Add 1 “Red Solo Cup” of boiled linseed oil to your paint can full of melted beeswax. The linseed oil does a good job of darkening the piece and really sealing it in. Keep in mind, if you apply this combination of things to a piece that’s too hot- you’ll “Burn” the linseed oil resulting in a brown and inconsistent finish.
Buy a Quart, that’s a good start.
This is available through amazon, Walmart, Home Depot, or just about any local hardware store.
Add 2 “Red Solo Cup” of Pure Gum Turpentine to your mixture. This works as an emulsifying agent between the linseed oil and the beeswax, and has the most effect on the consistency of the mixture in the end. If you want a soft paste (Useful for waterproofing boots, finishing wood, or applying to metal cold!) add more Turpentine, if you want a hard brick- add less. Over time, this component burns (Smokes) out, so from time to time we will add some more turpentine to the mix once it forms a brick, heating the container with a batch of bottle openers then stirring in some turpentine while it’s all liquid.
This is also available just about anywhere- but here’s the one we use:

Now that your components are combined- stir with a paint stirrer from time to time as it cools down. It’ll take a while to cool down, but stir it until it becomes a thick gel. If you fail to stir it during this cooling down period, it tends to separate. Once it’s fully cooled- you’re ready to start using it!
Warm your finishing oven to 350*, pack it full of the objects you wish to darken, and let it bake until they’re up to temperature. With a heavy load of steel items, our oven generally takes about 1-2 hours to get them all the way up to temperature. Once your pieces are up to temp- drop them into the paint can full of mixture, a few at a time. Make sure that the items you put in were able to fully melt down into the mixture before adding any more on top! Sometimes, you’ll pile a bunch up in there, and the bottom layer will cool down enough to sit on top or only halfway into the mix.
Once you’ve got a few in there, and they’re fully submerged, let them cool down in there for about 5 minutes- then pull them all out with a set of tongs that you don’t mind covering in goo, and place them all on piece of cardboard (Do not stack them, make sure they aren’t touching at this point). Grab a Terry Cloth towel (or Blue Shop Towel) and start rubbing them down, removing the excess wax as much as possible, being careful not to burn your hands on these pretty hot (probably still around 300F) objects. Sometimes we wear gloves for this, because honestly- its pretty easy to get burned at this stage. Depending on the temperature you started with, sometimes I like to do a second coat to get a darker finish. To do this, i’ll take these still warm pieces and put them back into the oven to again obtain a temperature of 350F. This second heating tends to oxidize the coating a bit, resulting in a darker finish. This second heating also drips flammable beeswax within the oven- so be sure to never set it above 350, and be ready for that oven to make alot of smoke! NEVER LEAVE THIS OVEN UNATTENDED, they tend to erupt in fire- especially if the door is open (Always keep the door closed!). After this second round of heating, toss them back into the mixture, let them cool for a few minutes in there, then place them back on a layer of cardboard. Once they’ve cooled down, rub them down the rest of the way with a terrycloth or blue shop towel and enjoy!
This coating will permeate the pores of the metal, bonding to the metal and forming a waxy, water resistant, “non stick” finish- much like seasoning a cast iron skillet.
The concept here is that we’re warming and opening the pores of the metal, and operating below the smoking temperature of the mixture so it can do it’s job.
Heating the objects to different tempering colors (for instance purples and blues) will be locked in by this process, excessive oxidation on the piece will also be exposed, particularly the Red colors- those will show. For production pieces, we soak our bottle openers in buckets of vinegar for a week or so, then rinse them, and wipe off all the oxidation. This process removes ALL the scale, but the result is a shiny object without enough oxide layer to darken. For these, we’ll usually toss them back in the forge for a quick heat cycle, obtaining a dull glow then allowing them to air cool- giving us an oxide layer without producing scale. Without this oxide layer- the results won’t be very dark.
^This is how we produce and finish pieces for retail, resulting in the best/most consistent finish possible. In classes or demonstrations on the other hand, we don’t have time to warm the piece to a specific and controlled temperature in an oven. For a “quick and dirty” method- we’ll cheat a little…
Take your “as forged” piece and wire wheel or wire brush it to remove as much scale and oxide as possible. HOWEVER, you do not want a perfectly clean/shiny piece- or it won’t have enough oxides on the surface to darken- resulting in a water resistant but silvery/shiny piece.
A quick round on the wire wheel is all we do for quick and dirty pieces.
Now we heat them in the forge, one or two at a time until JUST below glowing. Often times we’ll have a little bit of color showing on the thinner portions of items, but we want to get everything to a nice consistent heat, and it doesn’t need to be very hot at all- again, we’re shooting for about 350F.
Once they’re warm, we pull them out and rest them on a steel table to allow the temperatures to even out a little, any glowing areas to stop glowing, and then we quench in a bucket of Parks 50 quenching oil, stirring them around until “Most” of the heat is gone. We do this to remove temperature quickly before moving them to the beeswax mixture- hopefully at around a surface temperature of 350 or less. If you don’t have quenching oil, water would be fine for removing the temperature- just be sure you pull it out of the water and allow it to steam off the remaining water before tossing it into the beeswax mixture.
Once they’ve cooled in the beeswax (You want them to be able to pull out completely, without the beeswax sticking- just a thin liquid coating), pull them out and rest them on cardboard to cool down the rest of the way. Once fully cooled, rub the excess beeswax mixture off with a Terry Cloth or blue shop towel.
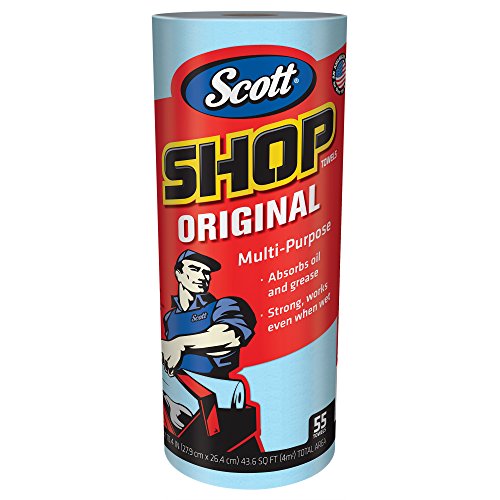
Tips:
If you’re not familiar with these blue shop towels, they’re FANTASTIC for this kind of application- as they’re rugged enough to get it done and then cheap enough to dispose of. Once coated in wax- these make great fire starters, so keep them out of your garbage can and be sure to dispose of/store them properly!
Concerns:
Keep in mind, this is now a paint can filled with highly flammable mixture. It should always be stored with a sealed lid on it, and kept in a fire proof cabinet, away from your forge and any other concerns within your shop. Apply all necessary cautions! Always keep the lid nearby when using it- so that you can throw the lid on to extinguish any flames that may be overtaking the can if you placed too hot and object in the mix. Applying the can to a hot can of the mixture WILL result in a vacuum forming inside the can, sucking the lid down and ruining the can. We also keep a standard linen hand towel around when finishing metal- as it’s a little easier to throw onto of the flaming can to extinguish any flames OR to contain any smoke (if you put an object in too hot, it’ll create a BIG cloud of smoke- which could ignite). The towel is a useful resource to have on hand, and keeps you from crushing (sucking in) your paint can if it can be avoided.
NEVER LEAVE THIS OVEN UNATTENDED, they tend to erupt in fire- especially if the door is open (Always keep the door closed!). Have a fire extinguisher ready, do this only in a well ventilated area, and be very mindful of your surroundings and actions!
We’re excited to have teamed up with Combat Abrasives, an awesome company producing sand paper, grinding disks, abrasive belts, and much more right here in the USA!
This California based company makes some top quality products and have earned a spectacular reputation within the knife making community. We are proud to partner with them, offering you a 15% discount site wide when using our affiliate link. These are the belts we use in the shop, and their ceramic “Shredder” belts are nothing shy of impressive when it comes to hogging metal off.
Stock up on sand paper, belts, and grinding wheels- we’re glad we can pass the savings along!
Thanks Combat!
Link:
…In the real world, they’re Mild steel at best and most similar in almost all material compositions (As elemental compositions other then Carbon content matter) to A36, commonly known as “mild steel”. (ASTMA36)
In conclusion, an MC Spike is slightly lower strength then steel you’d get at Home Depot, and an HC spike is VERY similar, but potentially “SLIGHTLY” stronger…….then steel from the isle in Home Depot. In the end- you’re making a mild steel/low carbon steel knife, and arguing otherwise.
